
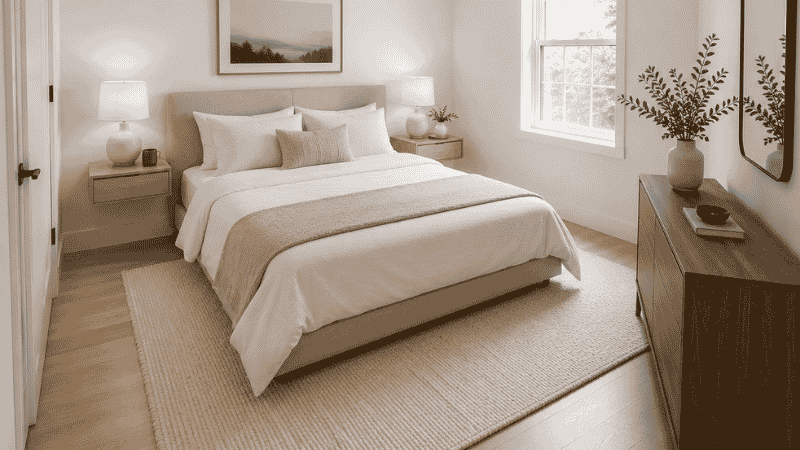
You’ve moved the bed three times. You’ve tried it against the left wall, then the right, then centered under the window. Every arrangement feels like a compromise — either the closet door won’t open fully, or there’s a weird dead zone in the corner you can’t figure out what to do with, or the room just feels like a hallway you happen to sleep in.
Here’s what most small bedroom guides won’t tell you: the problem usually isn’t the furniture you chose or how you decorated. It’s that you’re working without a layout system. You’re rearranging based on feel rather than formula, which means you can move the same four pieces of furniture a dozen times and still land on something that doesn’t quite work.
This guide fixes that. We’re going to walk through five small bedroom layout formulas — with specific measurements, furniture size guidelines, and the exact logic behind each arrangement. By the end, you’ll know which formula matches your room’s dimensions and shape, and you’ll have a clear starting point that isn’t guesswork.
Key Takeaways
- The 24-inch rule: Leave at least 24 inches of clearance on at least one side of the bed — 36 inches if it’s the primary walking side. This is the single measurement that determines whether a layout works or feels cramped
- Bed placement drives everything: In a small bedroom, the bed is the anchor. Every other piece of furniture gets positioned around it — not the other way around
- Vertical space is the most underused dimension: Most small bedrooms have 8–9 feet of wall height; most furniture stops at 6 feet. That gap is storage and visual space that most people leave completely empty
- Platform beds reclaim 7–9 inches: Switching from a traditional box spring setup to a low-profile platform bed drops the visual center of gravity and makes ceilings feel higher
- One mirror, placed right, can add the equivalent of a window: A 48-inch or taller mirror on the wall opposite a window doubles the light in the room — measurably, not just visually
Before Any Formula: The Three Numbers You Need
Don’t move anything until you know these three measurements. Sketch them on your phone or a notepad — they’ll determine which formula applies to your room.
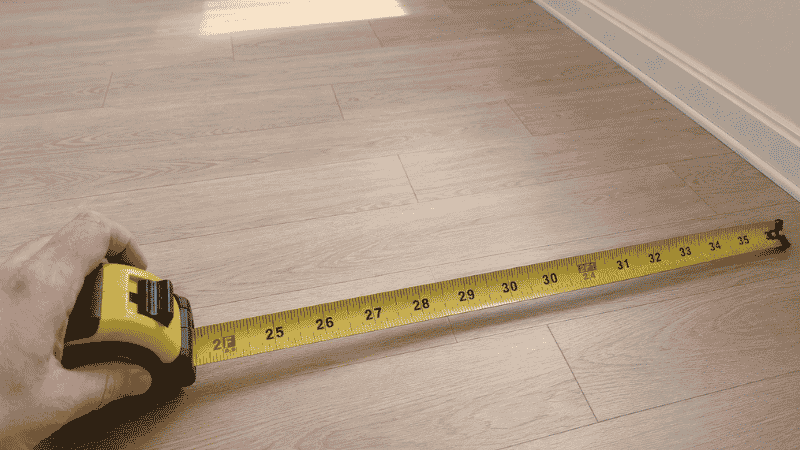
Room width: The shorter dimension of your room. This is the most constraining number in a small bedroom.
Room length: The longer dimension. Rooms under 10 feet long require a completely different approach than rooms that are 12+ feet long.
Bed footprint: Your mattress size plus the bed frame. A queen mattress is 60 × 80 inches; add a typical frame and you’re looking at roughly 62–65 × 82–85 inches of floor space.
Once you have these three numbers, match them to one of the five formulas below. If your room is under 10 feet wide, formulas 1 and 2 are your primary options. If it’s 10–12 feet wide, you have more flexibility. Over 12 feet wide, you’re not really working with a small bedroom — different rules apply.
Layout Formula 1: The Centered Wall Placement (The Foundation Layout)
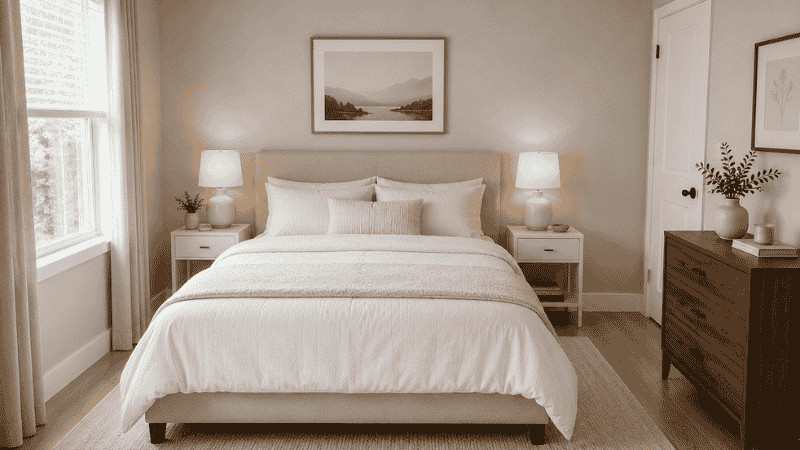
Best for: Rectangular rooms 10+ feet wide, rooms with a single window on one wall, rooms where the closet is on a side wall
This is the layout most designers recommend as a default starting point — and for good reason. Centering the bed on the longest solid wall creates natural symmetry, leaves both sides of the bed accessible, and defines the room’s visual focal point cleanly.
What makes this layout work in a small bedroom specifically is what you don’t add, not what you do. Most people center the bed and then try to fit a nightstand on each side, a dresser, and a chair. In a room under 120 square feet, that’s one or two pieces too many.
The formula:
- Bed: centered on the longest solid wall (not a window wall — more on that below), headboard touching or within 2 inches of the wall
- Nightstands: one on each side, maximum 20 inches wide × 20 inches deep — if the room is under 10 feet wide, use wall-mounted shelves instead of floor nightstands
- Dresser: on the opposite wall from the bed, or on a side wall — never on the same wall as the bed, which creates visual crowding
- Walking clearance: 24 inches minimum on one side, 36 inches on the other (the side you get out of most often)
The mistake people make here: Pushing the bed all the way into a corner to “save space.” This actually makes the room feel smaller and creates an awkward dead zone on one side of the bed that can’t be used for anything. The clearance on both sides is what gives the room air.
Layout Formula 2: The Corner Tuck (For Rooms Under 10 Feet Wide)
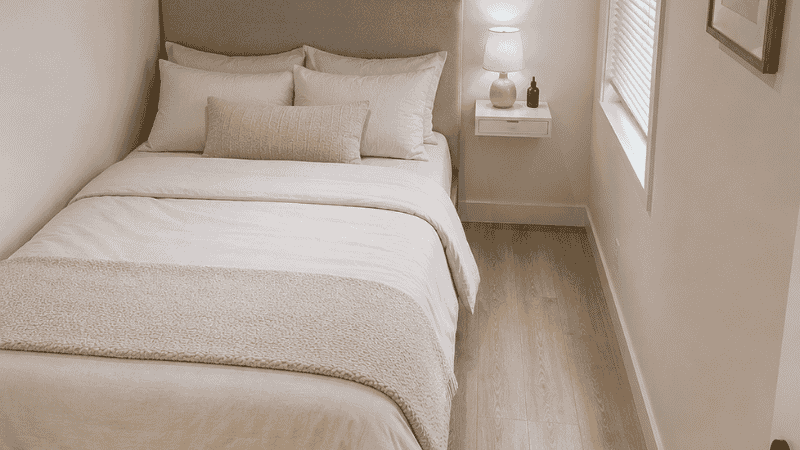
Best for: Narrow rooms under 10 feet wide, studio apartments where the sleeping area shares space with the living zone, rooms where you need maximum open floor space
When a room is genuinely narrow — think 9 × 12 or 8 × 11 — a centered bed placement often leaves only 12–18 inches of clearance on each side, which is too tight for comfortable daily use. The corner tuck layout solves this by accepting asymmetry in exchange for a functional walkway.
The bed goes into one corner, pushed against both the back wall and the side wall, with the open side facing the room. This concentrates the sleeping footprint in one quadrant and leaves the rest of the floor open.
The formula:
- Bed: headboard on the back wall, one side of the bed touching the side wall — leave a 2-inch gap between bed frame and wall so the bed can be made without stress
- Nightstand: one only, on the open side of the bed — a floating wall shelf at nightstand height (20–24 inches from the floor) works better here than a floor unit
- Storage: use the wall above the bed aggressively — floating shelves, a wall-mounted lamp, even a small wall-mounted hook rail for bags or tomorrow’s outfit
- Clearance: you should have at least 36 inches of open floor on the room side of the bed, which is the trade-off this layout is designed to create
One thing to get right: The bedding. A corner-tucked bed is harder to make if you have heavy, oversized bedding that needs to be tucked on the wall side. Fitted sheets, a duvet with a simple cover, and a flat pillow arrangement all make the wall side manageable.
Layout Formula 3: The Window Bed (When You’ve Run Out of Wall Space)
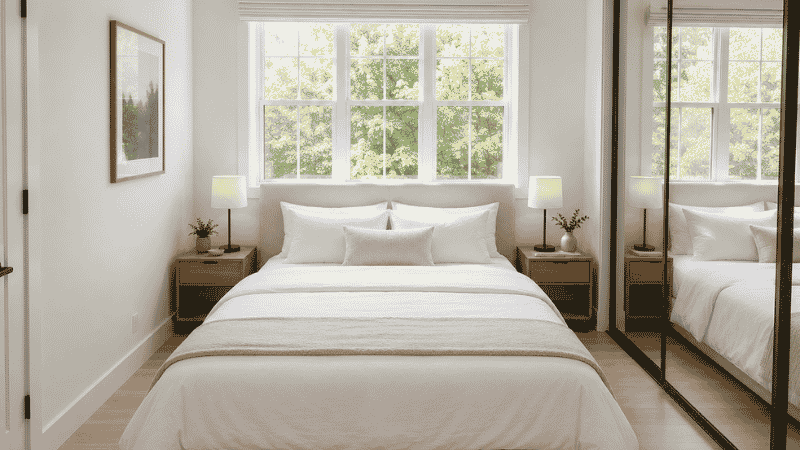
Best for: Rooms where doors, windows, and closets consume most of the usable wall length; rooms with a centered window on the main wall; very small rooms under 100 square feet
Placing the bed under or against a window is often treated as a last resort — something you do when nothing else fits. But done correctly, a window bed layout can actually be one of the most functional arrangements for a small bedroom. The key is understanding what goes wrong when it’s done carelessly.
The typical failure: bed pushed against the window wall with a standard tall headboard that blocks the light and makes the room feel like a cave. The fix is counterintuitive — go low. A platform bed without a headboard, or with a headboard under 30 inches tall, fits under most window sills without blocking light.
The formula:
- Bed: centered under the window, headboard against the wall below the window sill — the sill should clear the top of the headboard by at least 4 inches
- Window treatment: use a roller shade or roman blind (not curtains with floor-length panels) so the window opens and closes without interference from bedding
- Clearance on both sides: 24 inches minimum — this layout works best when the room is wide enough for bilateral clearance
- No objects above the window at bed height: anything hung or placed there becomes a hazard and a visual distraction
The bonus most people don’t realize: The wall opposite the window is now your entire usable wall — free from the bed. This is where you put the dresser, a full-length mirror, or a wardrobe unit. In a room where every other layout leaves the main wall fragmented, the window bed layout often gives you one large, uninterrupted storage wall for the first time.
Layout Formula 4: The Wardrobe Wall (When Storage Is the Real Problem)
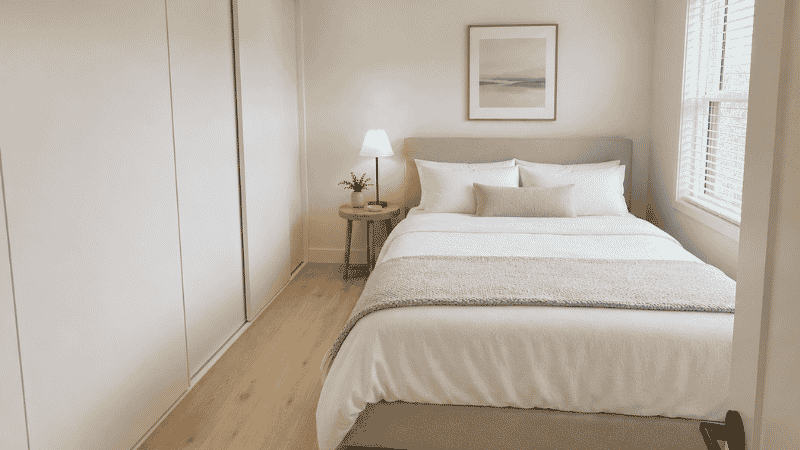
Best for: Bedrooms without a closet, rooms with inadequate built-in storage, renters who need to add significant clothing storage without permanent modifications
Many small bedrooms aren’t actually small — they’re under-organized. The floor space would be workable if the storage were handled properly, but instead there are piles on chairs, things under the bed, and a dresser that’s overflowing. In these situations, a layout change alone won’t help. You need to solve storage architecturally before you solve furniture placement.
The wardrobe wall layout dedicates one full wall — typically the wall opposite the bed or a side wall — to a continuous run of storage. This sounds like it would make the room feel smaller, but it consistently does the opposite. Containing all the storage in one place clears the rest of the floor and visual space, which is what actually creates the feeling of more room.
The formula:
- Wardrobe or closet system: floor-to-ceiling, full wall width — PAX-style modular systems from IKEA allow this in various room widths starting at 19.75 inches deep, which is the minimum depth for hanging clothes
- Sliding doors only: hinged wardrobe doors in a small bedroom consume 20–22 inches of floor clearance when open; sliding doors consume zero
- Bed placement: usually Formula 1 (centered) on the opposite wall, which now becomes the anchor wall
- No other storage pieces: with a full wall wardrobe, the dresser disappears — the wardrobe handles all clothing storage, freeing the rest of the room
The measurement that makes or breaks this layout: The distance between the wardrobe and the bed. You need at least 36 inches between the wardrobe face and the bed frame edge for a sliding door to operate comfortably and for you to stand and dress without feeling cramped. In a 10-foot-wide room with a queen bed (approx. 63 inches wide) and a 20-inch-deep wardrobe, you have 120 − 63 − 20 = 37 inches. Just enough. In a 9-foot room, it’s 108 − 63 − 20 = 25 inches — too tight for a wardrobe wall; use Formula 2 with under-bed storage instead.
Layout Formula 5: The Multifunctional Bedroom (When the Room Has to Do More Than Sleep)
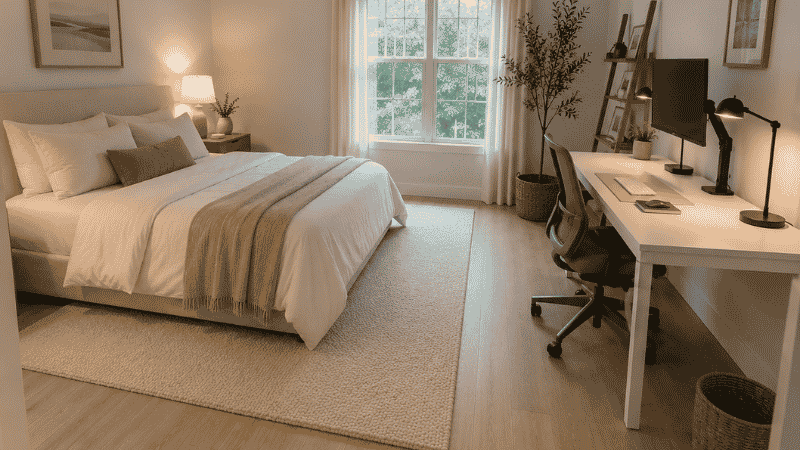
Best for: Studio apartments where the bedroom is also the living room, rooms that double as a home office, guest rooms that need to serve multiple purposes
This is the hardest layout to get right because you’re not just solving for one function — you’re solving for two or three simultaneously, and each function needs enough space to feel real rather than provisional.
The key insight: zones don’t need walls, they need edges. A rug defines the sleeping zone. The back of a low bookcase or the edge of a desk defines the working zone. A pendant light or a different ceiling treatment defines a reading area. You can have three distinct zones in a 12 × 14 room if each one has a clear perimeter.
The formula:
- Sleeping zone: bed on one wall (Formula 1 or 2 depending on width), with a rug extending at least 18 inches beyond the foot of the bed — this is the zone boundary
- Working zone: desk on an adjacent or opposite wall, minimum 48 inches wide × 24 inches deep for a functional workspace — use a wall-mounted monitor arm to reclaim desk surface
- Transition clearance: 36 inches between any two zone edges — this is the “aisle” that lets each zone feel like its own space rather than furniture crammed together
- No double-duty bed: resist the sofa bed or daybed solution unless the room is genuinely below 100 square feet — a proper bed in a multifunctional room sleeps better and looks more intentional
The lighting rule for multifunctional bedrooms: Each zone needs its own light source. The overhead light covers everything but defines nothing. A bedside lamp, a desk task light, and ideally a small ambient light in a third zone (a floor lamp in a reading corner, for example) let you activate each zone independently. This is one of the most effective ways to make a multifunctional room feel less like a compromise.
What To Do If Your Layout Still Isn’t Working
You’ve tried a formula. You measured correctly. It still doesn’t feel right. Before you start over, check these four things:
Furniture scale is off. The most common reason a correct layout feels wrong is furniture that’s too large for the room. A queen bed in a 9 × 10 room will always feel overwhelming. A dresser that’s 36 inches tall feels lower in an 8-foot room than in a 9-foot room. Pull up the dimensions of every piece in the room and compare them to the room size. If any single piece is consuming more than 40% of any wall’s length, it’s too large.
The rug is the wrong size. In a bedroom, the rug should extend at least 18–24 inches beyond the sides and foot of the bed. A rug that only fits under the bed frame (5 × 8 under a queen in a small room) makes the room look like the rug is hiding under the furniture rather than anchoring it. If budget is a constraint, a 8 × 10 in a simple texture always outperforms a 5 × 8 with a complex pattern.
The ceiling is doing nothing. In rooms under 100 square feet, ceiling height is one of the most underused visual tools. Curtains hung at ceiling height (not window height) draw the eye up and make the room feel taller. A pendant light drops down and gives the room a centerpoint. A ceiling-mounted curtain track can divide the room into zones without taking up floor space. If your ceiling is bare except for one overhead fixture, you’re leaving significant visual space unused.
There’s too much on the floor. Research published in the Personality and Social Psychology Bulletin found that cluttered, high-effort home environments elevate cortisol (the stress hormone) — particularly in women. Beyond the psychological effect, visual clutter at floor level compresses the perceived size of any room. Exposed bed frames with legs show floor underneath and make the room feel larger; solid-base platform beds without legs do the opposite. Cord management behind the TV or desk makes a measurable visual difference.
If You Only Have 10 Minutes: The Immediate Reconfigure
No time for a full rearrange? Do these four things right now:
- Pull the bed 2 inches away from the wall (both sides if possible, at least one side) — this small gap makes the bed feel intentional rather than wedged in
- Remove one piece of furniture from the room entirely, even temporarily — put it in a hallway or another room and live without it for 48 hours
- Move your largest mirror to face the window directly — if you don’t have a large mirror, this is the single highest-impact purchase for a small bedroom
- Clear everything off the floor except furniture legs and the rug — bags, shoes, cables, boxes all go somewhere else for 24 hours so you can see the actual floor plan
Most people are surprised to find that steps 2 and 4 alone make the room feel meaningfully different.
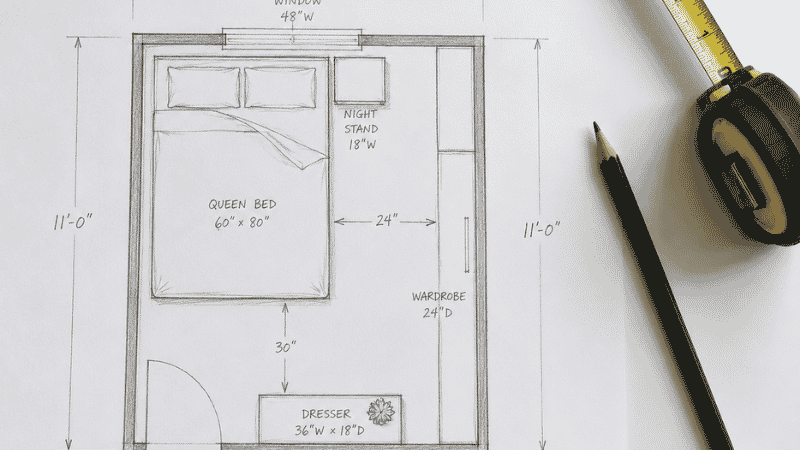
Furniture Sizing Cheat Sheet for Small Bedrooms
| Furniture | Recommended Max Size | Notes |
|---|---|---|
| Queen bed frame | 63 × 84 inches | Go platform (no box spring) in rooms under 10 ft wide |
| Full/Double bed frame | 56 × 76 inches | Better choice for rooms under 9.5 ft wide |
| Nightstand (floor) | 20W × 20D × 26H inches | Go wall-mounted if clearance is under 28 inches |
| Dresser | 36–42W × 18D × 32–36H inches | 18 inches deep clears most door swings |
| Wardrobe/armoire | Full wall width, 20–24D inches | Sliding doors only |
| Desk | 48W × 24D inches minimum | Wall-mounted option saves 24 inches of floor depth |
| Rug | 8 × 10 feet minimum under a queen | Front legs on rug is the minimum; full rug preferred |
FAQ: Small Bedroom Layout Questions
How do I arrange a small bedroom with a queen bed? Start with Formula 1 (centered on the longest solid wall). Measure clearance on both sides — you need 24 inches on one side and ideally 36 inches on the other. If the room is under 10 feet wide and those clearances aren’t achievable, either switch to a full/double bed or use Formula 2 (corner placement).
Should I put my bed against the wall? One side of the bed touching the wall (Formula 2) is fine if the room requires it. Both sides against walls creates a cramped, institutional feel and makes bed-making very difficult. If you’re forced into a corner by room dimensions, leave a 2-inch gap on the wall sides and compensate with a wall-mounted shelf at nightstand height.
How do I make a small bedroom look bigger? The most effective changes, in order of impact: (1) a large mirror facing the window, (2) ceiling-height curtains, (3) a low-profile platform bed, (4) removing one piece of furniture, (5) consistent color on walls and ceiling. Lighting and color are real tools, but none of them substitute for having the right furniture scale for the room.
What is the minimum bedroom size for a queen bed? The technical minimum is 10 × 10 feet, but this leaves almost no functional clearance. A more workable minimum is 10 × 12 feet, which gives you 24–27 inches of clearance on both sides of a standard queen frame. In a 9 × 12 room, a full/double bed is a better choice — the 8-inch difference in mattress width creates a functionally different room.
How do I layout a bedroom with no closet? Use Formula 4 (Wardrobe Wall). Measure the room width and subtract the bed width plus 36 inches of clearance — what’s left is your available wardrobe depth. If it’s 20 inches or more, a sliding-door wardrobe system can work. If it’s less than 20 inches, you’ll need to split storage across multiple smaller pieces (under-bed drawers + a shallow dresser + wall hooks) rather than concentrating it in one unit.
What size nightstand for a small bedroom? Maximum 20 inches wide × 20 inches deep if it’s a floor unit. In rooms where the bed clearance is under 28 inches, replace floor nightstands entirely with wall-mounted shelves at 24–26 inches from the floor. A 10 × 10-inch floating shelf with a small lamp and one drawer is functionally equivalent to a nightstand and takes zero floor space.
Where should I put a dresser in a small bedroom? Opposite the bed when possible — this keeps the main walking path clear and gives the dresser natural light. If the opposite wall is too narrow (under 36 inches), a side wall works. Never put the dresser on the same wall as the bed; it creates visual crowding and makes both pieces feel smaller than they are.
The Bottom Line
Small bedroom layout problems are almost always measurement problems in disguise. The bed is too large for the room, the clearance is too tight on both sides, or storage pieces are scattered around the perimeter when they should be consolidated on one wall. The formulas in this guide all start from the same place: measure first, choose your anchor piece (the bed), position everything else around it with specific clearance numbers in mind, and then remove whatever doesn’t fit.
A small bedroom done right isn’t a compromise. It’s a room where every square foot has a job, the layout makes daily movement feel effortless, and there’s nothing on the floor that doesn’t need to be there.
Next step: Once you’ve sorted the layout, the bed frame you choose makes a significant difference in how the room functions. Read our guide on the best bed frames for small bedrooms — including specific picks under $500 with storage drawers built in. And if you’re working with an open-plan space, our small living room layout guide covers the zone-definition principles that apply to multi-purpose rooms.
References
- Saxbe, D. E., & Repetti, R. (2010). No Place Like Home: Home Tours Correlate With Daily Patterns of Mood and Cortisol. Personality and Social Psychology Bulletin, 36(1), 71–81. (Research on home environment and cortisol/stress response)
- National Kitchen and Bath Association (NKBA): Bedroom Planning Guidelines — minimum clearance standards for residential bedroom design, including 24-inch primary clearance and 36-inch accessible-side clearance recommendations
- Apartment Therapy House Tour Archive, 2025–2026: Real small bedroom layouts from apartments ranging from 275–650 square feet
Published on Grainv.com | Category: Small Bedroom · Layout Guides | Related: Small Bedroom Furniture, Bed Frames with Storage, Small Apartment Layout Ideas