
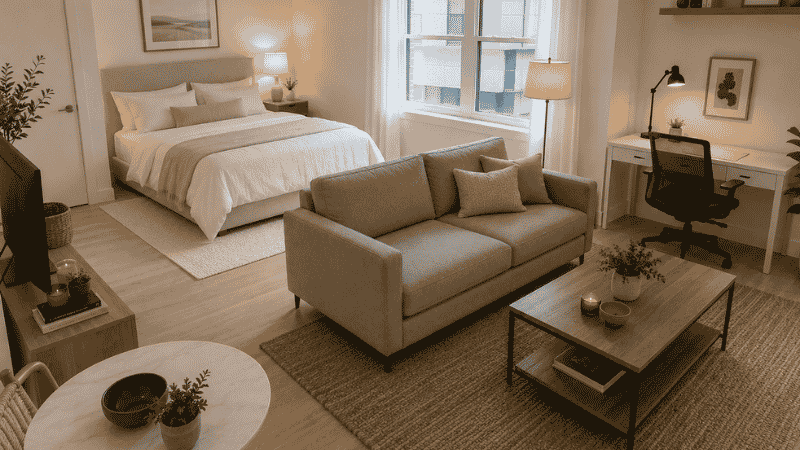
There’s a specific kind of frustration that comes with studio apartment living. You’ve arranged the furniture seventeen different ways. The bed is always visible from the “living room” — which is also the dining room, the office, and the entryway. When a friend comes over, you both sit on the bed because there’s nowhere else to go. The kitchen is three feet from your pillow. And no matter what you do, the whole place looks like a waiting room you happen to sleep in.
Here’s the uncomfortable truth: most studio apartment layout advice is designed for spaces with good bones — open, square, lots of natural light, thoughtful proportions. Your actual studio is probably long and narrow, or has the bathroom door opening directly into the sleeping area, or has exactly one window that faces a wall. Generic advice doesn’t translate.
This guide is different. We’re going to give you specific studio apartment layout ideas based on actual square footage, room shape, and the functions your space needs to serve simultaneously. There are no mood boards here — just formulas, measurements, and a clear system for turning one room into something that genuinely works.
Key Takeaways
- Zones don’t need walls — they need edges: A rug, the back of a sofa, a bookcase, a change in lighting — any of these creates a boundary that makes your brain register “different room”
- The 400 sq ft threshold: Studios under 400 sq ft need a fundamentally different furniture strategy than those above it — mixing these approaches is why most layouts fail
- Bed orientation determines everything: In a studio, which direction your bed faces sets the layout logic for the entire space — get this wrong first and no amount of accessorizing fixes it
- One sofa rule for studios under 350 sq ft: A standard 84-inch sofa in a small studio consumes 30% of usable floor space; two chairs at 28 inches each consume 17% and feel more open
- Lighting is your cheapest zone divider: Three separate light sources (one per zone) cost under $200 total and create more perceived separation than a $500 room divider screen
First: Figure Out What Kind of Studio You Actually Have
Not all studios are the same. Before you pick a layout formula, identify which category your space falls into. This single step will save you from trying strategies that were designed for a completely different room shape.
By square footage:
- Under 300 sq ft — Micro studio. Every piece of furniture must earn its place. Sofa beds, Murphy beds, and wall-mounted storage are not optional extras — they’re structural.
- 300–450 sq ft — Standard studio. You have options, but still need a deliberate zone strategy. A proper sofa is possible; a sectional is probably not.
- 450–600 sq ft — Large studio or junior one-bedroom. You can use most standard furniture at proper scale. The challenge is defining zones clearly enough that the space doesn’t feel like one big room.
By shape:
- Rectangle (most common) — Long wall is your anchor. Bed goes on the short wall or the long wall depending on width.
- L-shape — The corner is a gift. The alcove becomes the sleeping zone naturally; the longer arm becomes living and kitchen.
- Square — Hardest to zone because there’s no obvious longer wall to anchor to. Rugs and furniture placement do all the work.
Write down your square footage and shape before reading further. Every formula below specifies which type it works for.
Studio Apartment Layout Ideas by Square Footage
Layout A: The Micro Studio (Under 300 sq ft)
This is the most constrained layout category, and it requires the most disciplined thinking. In a space this size, every square foot has a specific job — there’s no room for “nice to have” furniture or decorative pieces that don’t also serve a functional purpose.
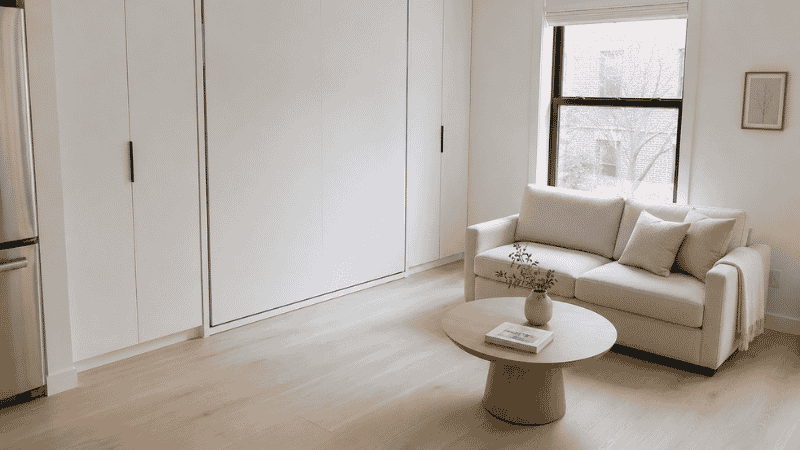
The core principle: The bed is the room’s anchor and its largest footprint. In a micro studio, the entire layout is built around minimizing the visual and physical dominance of the bed during waking hours.
What works:
A Murphy bed (wall bed) is the single highest-impact investment for a micro studio. When folded up, it reclaims 35–50 square feet of floor space — the equivalent of a small bedroom. Modern Murphy systems integrate a sofa or desk that flips out when the bed folds up, so the space literally transforms between day and night modes. The bed footprint during the day is zero; the living room or office materializes in its place.
If a Murphy bed isn’t feasible, a daybed or a platform bed with drawers is the next best option. A daybed (typically 38 × 75 inches) is smaller than a twin mattress and can be styled as a sofa during the day with the right throw and pillow arrangement. A full-size platform bed with under-bed drawers (18 inches of clearance below) eliminates the need for a separate dresser — freeing one full wall.
Furniture maximum sizes for under 300 sq ft:
- Bed: Full/double platform maximum (54 × 75 inches) — a queen is possible but will dominate
- Seating: Two 28-inch accent chairs OR a loveseat (max 60 inches) — not a full sofa
- Coffee table: 24-inch round maximum, or a 16-inch-high storage ottoman that doubles as seating
- Storage: Vertical only — floor-to-ceiling shelving on one wall, nothing wide and low
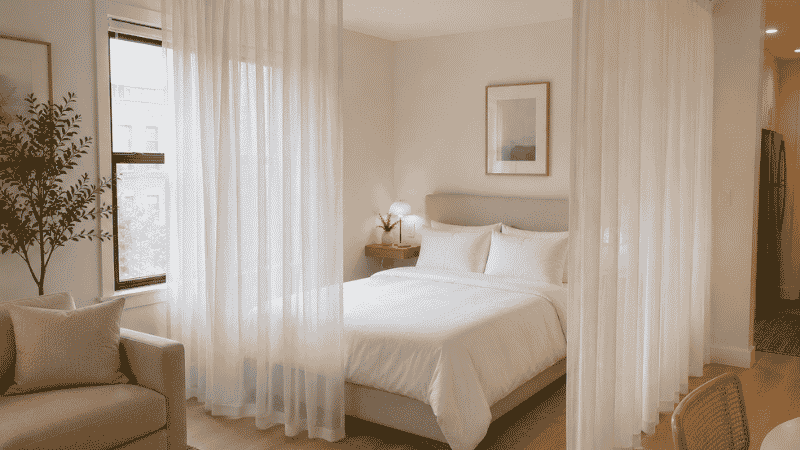
The one zone you must define: The sleeping zone. In a micro studio, having a visible bed all day is the primary source of the “I live in a hotel room” feeling. Use one of these to define a sleeping boundary: a curtain rod mounted at ceiling height with floor-length curtains that can close around the bed; a bookcase used as a headboard wall behind the bed; or a canopy frame above the bed that signals “this is a separate room.” The zone doesn’t need to be enclosed — it needs to have an edge.
Layout B: The Standard Studio (300–450 sq ft)
This is the most common studio size, and the category where most layout advice fails because it doesn’t account for the specific tension at this size: you have just enough room to have real furniture, but not quite enough room to let it breathe the way it would in a larger space.
The core principle: Three distinct zones — sleeping, living, working — each with its own anchor piece, its own rug, and its own light source. The zones share floor space but not visual identity.
Zone 1: The Sleeping Zone
The bed goes against the wall with the least foot traffic — usually the wall furthest from the entry door and farthest from the kitchen. Orient the bed so its long side faces the room rather than being tucked into a corner, which makes it easier to make and gives you clearance on at least one side.
Minimum clearances: 24 inches on one side of the bed (the side you get out of most often), and at least 18 inches on the other side. If your room is narrow and you can’t achieve 24 inches on both sides, use the corner tuck (one side against the wall) and add a wall-mounted floating shelf at 24-inch height as the nightstand — this keeps the floor clear.
Define the sleeping zone’s edge with a rug that extends 18–24 inches beyond the foot of the bed. The rug edge is the zone boundary. Anything outside the rug is a different zone.
Zone 2: The Living Zone
In a 300–450 sq ft studio, you have room for a sofa — but it needs to be the right sofa. Maximum length: 82 inches (standard 3-seater). Depth: 32–34 inches maximum (shallower profiles give you more walking room and don’t visually compress the space). Legs on the sofa — not a skirted base — show the floor underneath and make the room feel larger.
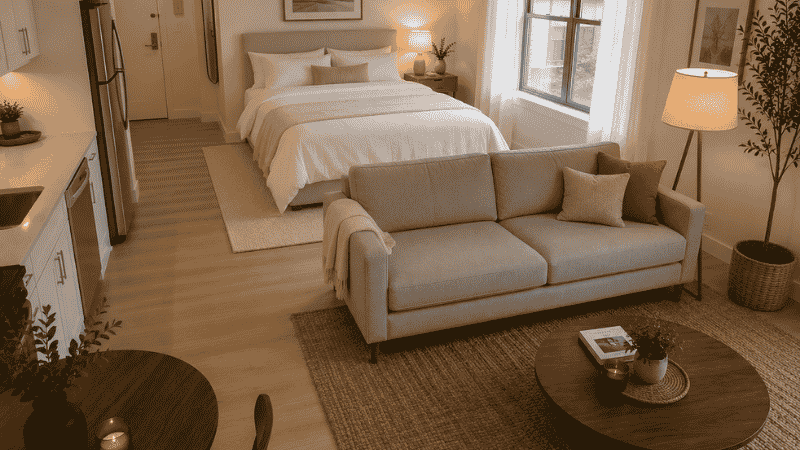
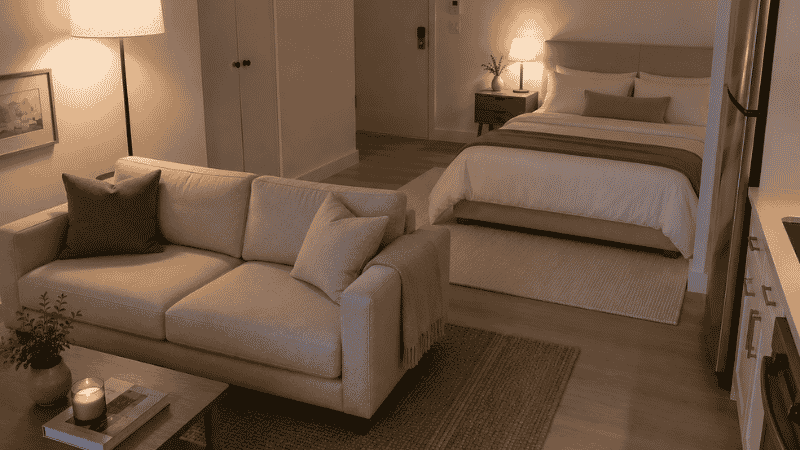
Position the sofa so its back faces the sleeping zone. This is the single most effective zone-creation move in a standard studio: the sofa back acts as a visual wall, signaling to anyone in the living zone that the sleeping area is “behind” them and not part of the current space. Combine this with the rug edge at the foot of the bed, and you have two zone boundaries working together.
Living zone rug: 8 × 10 feet minimum, positioned so front sofa legs sit on it.
Zone 3: The Working Zone
In most studios, the working zone is the most neglected — often a dining chair pulled up to the coffee table, which is why work-from-home in a studio feels so uncomfortable. A dedicated working zone doesn’t need much space, but it needs a clear boundary.
A 48 × 24-inch desk positioned perpendicular to a wall (not flat against it, but sticking out into the room slightly) creates a mini-office alcove. The desk’s short side against the wall and the desk chair facing the desk creates a focused orientation — your back is to the room, which psychologically separates “work mode” from “home mode” even in the same open space.
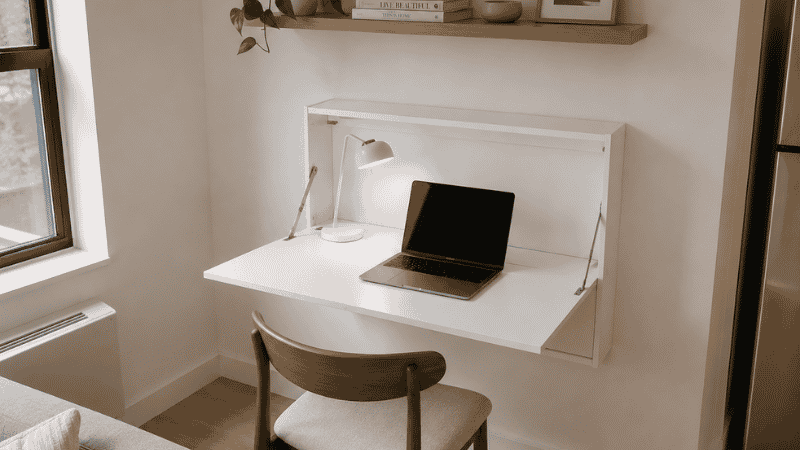
If floor space doesn’t allow a freestanding desk, a wall-mounted fold-down desk (20 inches deep when open, zero footprint when closed) on a side wall handles this function entirely.
Layout C: The Large Studio (450–600 sq ft)
At this size, the challenge shifts from “how do I fit everything in” to “how do I make this not feel like one enormous room.” Without deliberate zone-making, a 550 sq ft studio can feel less cozy and functional than a well-designed 350 sq ft studio, because the open space has no anchor points.
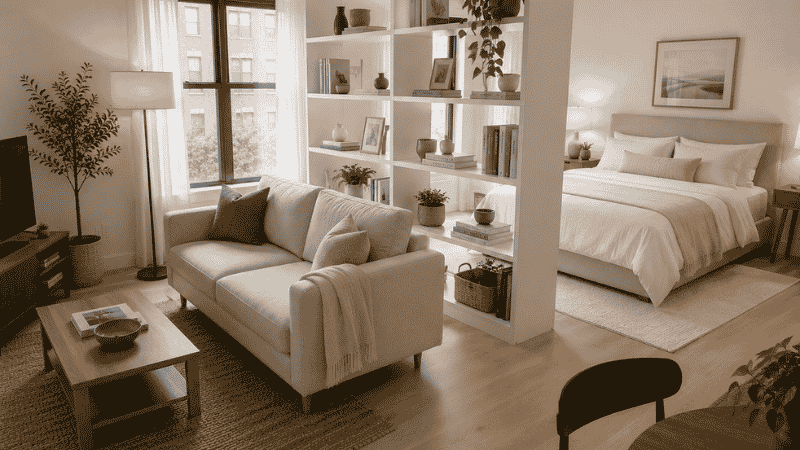
The core principle: Use furniture as architecture. At this size, you have enough room to position pieces perpendicular to walls, to float furniture away from walls on all sides, and to create genuine physical separation between zones — not just visual separation.
What’s different at this size:
A sectional sofa becomes viable. An L-shaped sectional with a short arm (max 60 inches) and a long section (max 90 inches) placed in the center of the room — not against any wall — creates a genuine living room that feels distinct from the rest of the space. The sofa back faces the sleeping zone, the open L faces a coffee table and TV, and the overall configuration feels like a room within a room.
A bookcase or open shelving unit (36–42 inches tall, not floor-to-ceiling) used as a room divider between the sleeping and living zones gives physical separation while preserving the visual openness of the space. Kallax-style units work particularly well: the open back lets light pass through, and the shelves create storage on both sides simultaneously.
At 450–600 sq ft, you can also consider a loft bed if ceiling height allows (minimum 9 feet). A loft bed elevates the sleeping zone, freeing the entire floor area beneath it for a desk, a reading chair, or a compact sofa — effectively creating a second functional area in what would otherwise be dead space.
The 4 Best Zone Dividers (And What Actually Works)
Most studio apartment zone-dividing advice includes the same list: room dividers, curtains, bookshelves, rugs. But there’s a significant difference between zone dividers that work and zone dividers that just add visual clutter. Here’s an honest breakdown:
Rugs — highest ROI, non-negotiable
A rug under each zone (sleeping + living) is the foundation of every successful studio layout. The rug edge is a physical boundary your brain registers even without consciously noticing it. Size matters enormously: an undersized rug (5 × 8 under a sofa in a living zone) actively makes the zone feel smaller and less defined than no rug at all. Minimum for the living zone: 8 × 10. Minimum for the sleeping zone: extends 18 inches beyond the foot of the bed. The gap between the two rugs — even 12 inches — signals zone separation.
The sofa back — most underused divider
Positioning the sofa with its back facing the sleeping zone is the most spatially efficient zone divider available. It costs nothing (you already have a sofa), it takes zero additional floor space, and it creates a clear visual boundary between zones. The sofa back at 28–34 inches height is enough to register as a “wall” from the sleeping side without blocking sightlines from standing height.
Open bookshelves — best for under 450 sq ft
A bookcase placed perpendicular to the room (sticking out from the wall like a peninsula) at 60–72 inches tall creates genuine physical separation while allowing light and air to pass through. IKEA’s Kallax series (77 inches tall, various widths) is the most commonly used for this purpose — the lack of a back panel means it functions as transparent architecture rather than a solid wall. Place it so it creates a “hallway” between zones, not a dead corner.
Lighting — cheapest, most transformative
Each zone needs its own dedicated light source, and the overhead light doesn’t count as any zone’s light — it’s the baseline. A floor lamp in the living zone, a bedside lamp in the sleeping zone, and a desk lamp in the working zone create three pools of light that define their zones independently. You can have the living zone lamp on and the sleeping zone lamp off, and the visual separation is immediate. This three-lamp configuration costs $150–250 total and creates more zone definition than most $400 room dividers.
Studio Apartment Furniture: What to Buy, What to Skip
In a studio, every furniture decision is higher stakes than in a larger home because you have no room to absorb mistakes. Here’s a direct guide to the most common furniture questions:
Sofa or chairs?
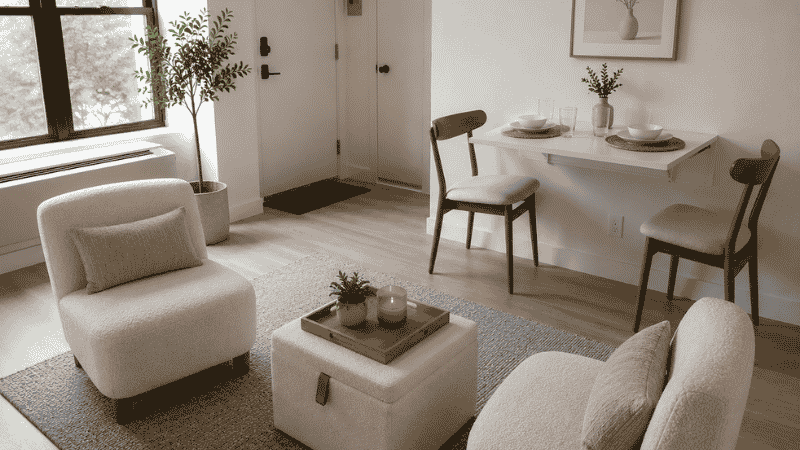
For studios under 350 sq ft: two accent chairs (28–30 inches wide each) consume less floor space than a loveseat, feel less permanent, and can be repositioned for different configurations (conversation, TV watching, hosting). For studios 350 sq ft and above: a proper 82-inch sofa works and creates a better-defined living zone. The sofa’s superior zone-creation power outweighs the space savings of chairs at this size.
What size coffee table for a studio?
Round or square, 28–36 inches diameter or width. A rectangular coffee table over 48 inches becomes a traffic obstacle in a studio. A storage ottoman (square, 18 inches high, with a lid and tray) is often the better choice — it’s a coffee table, extra seating, and hidden storage simultaneously.
Dining table or no dining table?
In studios under 350 sq ft: skip the dining table. A 24-inch bar-height counter extension off the kitchen island or a wall-mounted fold-down table (24 × 36 inches when open) serves the same function. In studios 350 sq ft and above: a round dining table (36 inches diameter, seats two comfortably, four tightly) can work if positioned in a corner or against the kitchen wall, leaving the center of the room clear.
Dresser or wardrobe?
In a studio without a dedicated closet: a floor-to-ceiling wardrobe with sliding doors (20 inches deep minimum for hanging clothes) is a better investment than a dresser. It consolidates all clothing storage in one contained system, keeps the floor clear, and doesn’t require multiple pieces. If a wardrobe isn’t feasible, choose a dresser no wider than 40 inches and no deeper than 20 inches — anything larger starts to consume disproportionate wall space.
What To Do If Your Studio Layout Still Feels Like One Big Room
You’ve defined zones. You’ve bought the right furniture. It still feels like a hotel room with too much stuff in it. Here’s the diagnostic:
Check your rug situation first. If the rugs are too small, the zones collapse visually. An 8 × 10 rug that should anchor the living zone but only fits two sofa legs (not all four) defeats its purpose. Rug size is the most commonly underestimated variable in studio layouts.
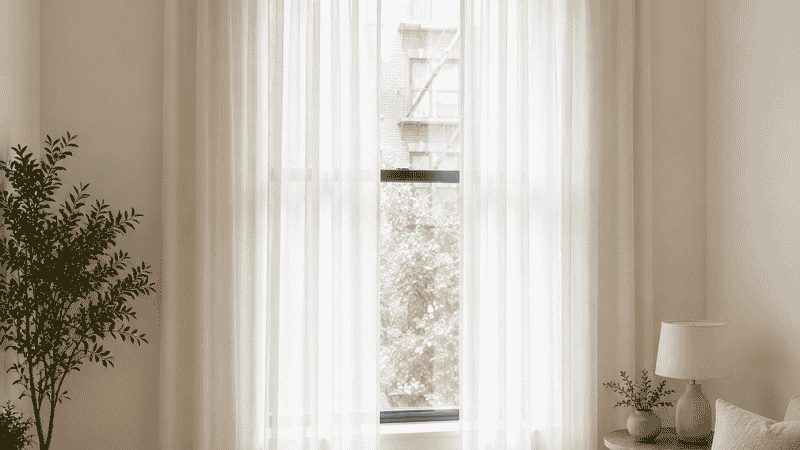
The ceiling is probably doing nothing. Curtains hung at window height rather than ceiling height compress the room vertically. Floor-to-ceiling curtains on a ceiling-mounted track — even if the window is only 4 feet tall — draw the eye up and make the room feel significantly taller. This is especially impactful in studios with 8-foot ceilings, which is the most common ceiling height in urban apartments.
You have too much furniture at the same height. Sofas, dressers, and coffee tables all at 18–30 inches creates a flat visual landscape. Introduce height variation: a floor lamp at 60 inches, a bookcase at 72 inches, an accent chair at 38 inches, a low coffee table at 16 inches. The varied heights create visual layers that make the space feel more complex and more like separate rooms.
The sleeping area isn’t private enough. Research published in the Journal of Environmental Psychology found that perceived spatial privacy — even in open-plan spaces — significantly affects occupants’ sense of comfort and control over their environment. In a studio, this doesn’t require walls: a canopy frame above the bed, ceiling-height curtains that can be drawn around the sleeping zone, or a tall headboard (48+ inches) all create enough visual enclosure to register as a distinct private space.
If You Only Have 10 Minutes: The Immediate Studio Refresh
Can’t do a full rearrange? These four changes take under 10 minutes each and make a measurable difference:
- Turn one lamp on and turn the overhead light off — instantly zones the room into “wherever the lamp is” and “everywhere else”
- Move your largest rug so its edge aligns with the foot of your bed — this creates a sleeping zone boundary without moving any furniture
- Flip your sofa so its back faces the bed — if it currently faces the bed, this single move creates a zone division
- Remove everything from the floor that isn’t furniture — bags, shoes, boxes, laundry. The floor is your most valuable visual asset in a studio; covering it shrinks the room faster than anything else
FAQ: Studio Apartment Layout Questions
How do I arrange a studio apartment? Start by identifying your three zones: sleeping, living, working. Place the bed first — it’s your largest piece and everything else arranges around it. Then position the sofa back-to-back with the sleeping zone (its back facing the bed), define each zone with its own rug, and add one dedicated light source per zone. This framework works for studios from 250 to 600 sq ft.
How do you separate a bedroom from a living room in a studio apartment? The most effective separators in order of impact: (1) sofa positioned with back facing the bed, (2) rug edges as zone boundaries — living zone rug and sleeping zone rug with a 12-inch gap between them, (3) open bookcase or shelving unit used as a peninsula divider, (4) curtain track mounted at ceiling height with curtains that can close around the sleeping zone. You don’t need all four — typically two of these working together is enough.
What size furniture for a studio apartment? Sofa: maximum 82 inches long, 34 inches deep. Bed: queen maximum in studios over 350 sq ft; full/double in studios under 350 sq ft. Coffee table: 36-inch round maximum. Dining table: 36-inch round if the studio is over 350 sq ft; wall-mounted fold-down if under. Wardrobe: full wall width, 20 inches deep minimum, sliding doors only.
What is the best layout for a studio apartment? It depends on your square footage and room shape. For micro studios under 300 sq ft: Murphy bed or daybed to maximize daytime floor space. For standard 300–450 sq ft studios: three-zone layout with sofa back as divider. For large 450–600 sq ft studios: open bookcase peninsula + sectional sofa floated away from walls. There’s no universal “best” layout — there’s only the layout that matches your specific room dimensions.
How do I make my studio apartment feel less like one big room? Three things work reliably: vary the furniture heights (low coffee table + tall bookcase + mid-height sofa creates visual layers), use two different rugs to define two zones, and add separate light sources for each area. The goal is to give each zone a distinct visual identity without building walls.
Is a queen bed too big for a studio apartment? In studios over 350 sq ft, a queen bed typically works if the room is at least 10 feet wide. You need 24 inches of clearance on at least one side and 18 inches on the other. In studios under 350 sq ft, a full/double bed (54 × 75 inches vs. 60 × 80 inches for a queen) recovers meaningful floor space and is worth considering. The 8 additional inches of mattress width rarely justify the floor space cost in a tight studio.
How do I make a studio apartment look bigger? Five strategies, ranked by impact: (1) ceiling-height curtains even on short windows, (2) a large mirror facing the primary light source, (3) furniture with legs rather than solid bases — exposed floor reads as more space, (4) one consistent light-toned rug rather than multiple small rugs, (5) remove one piece of furniture from the room entirely. No decorating technique substitutes for reducing furniture count in a studio.
The Bottom Line
The hardest thing about studio apartment living isn’t the size. It’s the absence of walls — the lack of the physical boundaries that naturally separate one life function from another in a larger home. Every layout strategy in this guide is ultimately about creating those boundaries with the tools you have: furniture edges, rug boundaries, light sources, and height variation.
Get the zone logic right first. Then choose furniture that fits the scale of each zone. Then layer in light. The studio apartment layout ideas that actually work aren’t about clever tricks or creative storage hacks — they’re about systematic thinking applied to a space where nothing can be left to chance.
Ready to go deeper? If your studio has a living area that feels particularly challenging, our small living room layout guide covers sofa placement formulas and furniture sizing rules that apply directly to studio living zones. And if the sleeping side of your studio needs attention, our small bedroom layout guide has five bed placement formulas with exact clearance measurements.
References
- Sternberg, E. M. (2009). Healing Spaces: The Science of Place and Well-Being. Harvard University Press. (Research on how spatial boundaries and environmental perception affect stress and comfort)
- Gifford, R. (2014). Environmental psychology matters. Annual Review of Psychology, 65, 541–579. (Review of how physical environment including spatial crowding and zone definition affects psychological well-being)
- Apartment Therapy House Tour Archive, 2025–2026: Real studio apartments ranging from 190 to 550 square feet, curated layout analysis
Published on Grainv.com | Category: Apartment Layout Guides | Related: Small Living Room Layout, Small Bedroom Layout, Multifunctional Furniture Ideas